If you’re reading this article, you’re a step closer to being a pioneer in the new age of hardware wallets.
Hugware was designed to simplify the digital asset backup process, making it easier for more people to adopt cold wallets safely. Cold or hardware wallets are the best at protecting digital assets because they keep private keys offline and safe from hackers when not in use. But many cold and hardware wallets in the market are backed up with seed phrases, which are prone to errors, phishing, or theft. Once the seed phrase is compromised, the wallets tied to the same seed phrase will be unsafe.
With Hugware, the seed is generated and stored in the Authentication Key and synchronised in the backup device, known as the Rescue Key. As the seed is not translated into mnemonic phrases, users are protected from seed phrase vulnerabilities. Should the user require more backups, they can simply obtain a new Authentication Key (A-Key) or Rescue Key (R-Key) that they can synchronise with their existing Hugware keys. As long as their Hugware devices are synchronized with the same seed, there is no need to recreate accounts.
A-Key
R-Key
You can buy Hugware directly from the website, at ukiss.io/shop. Just add Hugware to the shopping cart, complete the payment, and wait for it to be delivered to your doorstep. Hugware products are shipped out of Singapore and delivery waiting times may vary depending on your location. Remember that tax and shipping costs are borne by the customer. For refunds and returns, please read our policy.
When buying Hugware online, you may notice that your purchase comes with a free two-year Suite subscription for U-Archive, which is a Hugware-supported file encryption software launched on Sep. 30. After your purchase is completed, you should check your inbox for the software license key, which is your activation code, and a link to download U-Archive. Alternatively, for those who already have a UKISS account, you may find your license key in your account dashboard, under License Keys, and download U-Archive from ukiss.io/downloads.
Once you have received your Hugware, please check that your package contains a Getting Started card, a Know Your Hugware information booklet, and a set of Hugware Authentication Key and Rescue Key.
If you would like to enjoy a five-year warranty or discounts on upcoming products and services, it is important that you register your product on the website to receive relevant updates and details. UKISS Technology treats data privacy seriously, please read our privacy policy.
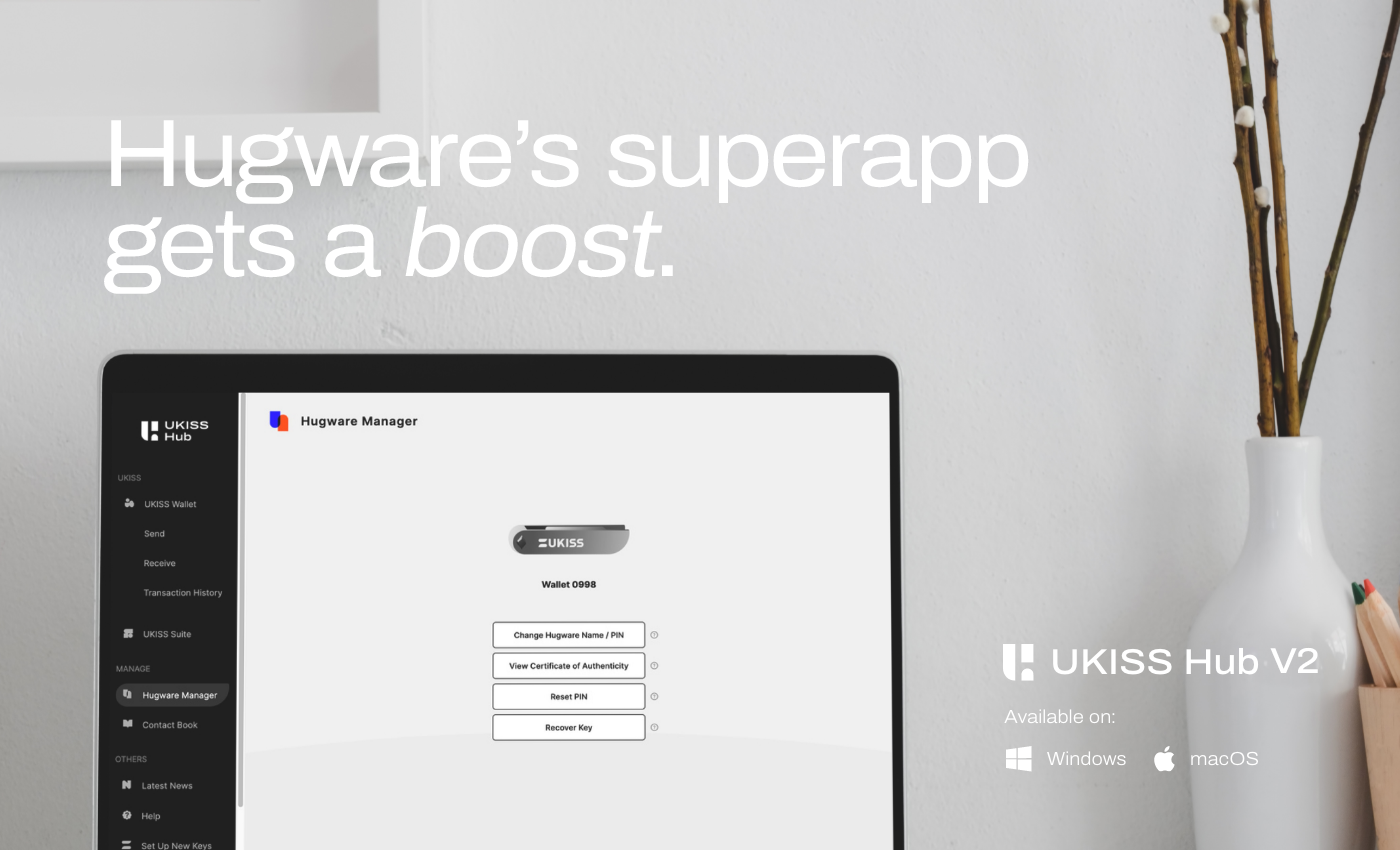
Hugware users must download the UKISS Hub software to initialise and manage their devices, set up and manage crypto accounts, and access all other UKISS- and Web3- related applications and services. The software currently runs on desktop only. Please check the website or our official social channels for updates on our UKISS Hub Android launch.
Before downloading UKISS Hub, please check that your desktop’s operating system (OS) is at least a Windows 10 or macOS 10. If your device is running on older systems, please update your OS before downloading UKISS Hub. To download UKISS Hub, go to ukiss.io/downloads and click on the UKISS Hub icon. Once downloaded, proceed to install UKISS Hub on your device.
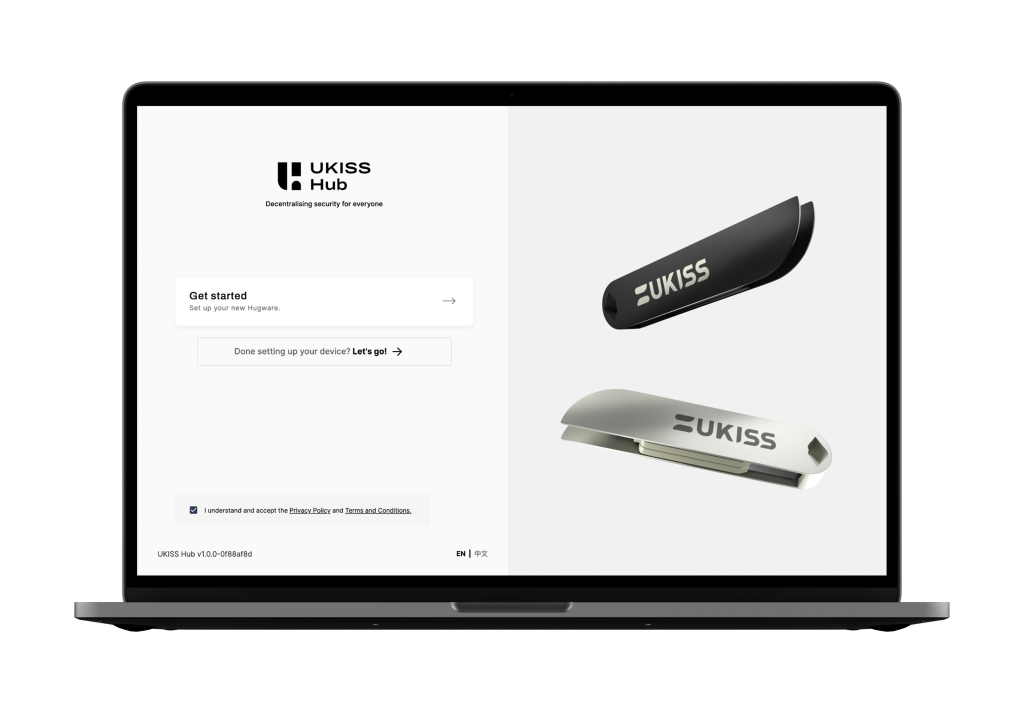
After you have installed UKISS Hub on your desktop device, launch the software on your computer. The first thing you will see is a Get Started page. Check the box to agree to the Terms & Conditions and click Get Started to start the initialisation wizard.
Before you begin the initialisation process, please check that you have two available USB ports on your device so that you can connect both the A-Key and R-Key at the same time.
Those using a USB port hub should check its compatibility by inserting the A-Key followed by the R-Key to confirm that your device can detect both Hugware keys through the hub. Once you are sure that your device can detect both Hugware keys, you may proceed with the initialisation. To ensure a secure setup environment, you may disconnect your internet connection.
There are three steps to initialising Hugware through the “Set Up New Keys” wizard. When you’re ready, click Next.
The first step to initialisation is connecting the A-Key. Once UKISS Hub has detected your A-Key, click Next. A blue loading bar indicates that the master seed is being generated.
Once your A-Key has been initialised, do not disconnect your A-Key as this will disrupt the initialisation process. If this happens, the software will then require the user to complete the setup through the Recover Key function.
With your A-Key initialised and still connected to your device, you may click Next and connect the R-Key. Once UKISS Hub has detected the R-Key, click Next again. You will then see a blue loading bar indicating that your A-Key is being paired with the R-Key.
After you have completed setting up and pairing your Hugware, you must set up a PIN for the A-Key and R-Key, respectively. The PIN should be 6 to 15 characters long and contain either letters, numbers, or both. You may use the same or different PINs for your Hugware devices.
Congratulations on setting up your first Hugware! If you need more information on setting up Hugware, watch the tutorial on YouTube or read the user guide. Now, it’s time to create your wallet addresses and start securing your assets.
Hugware generates different public and private key pairs for each asset, allowing the user to have multiple wallet addresses. To start adding assets to your Hugware, go to UKISS Wallet on UKISS Hub. This process begins with adding a wallet, an account, and assets.
Each “wallet” is tied to a single master seed. So if you have a separate set of Hugware containing a different master seed, that Hugware set will have its own wallet section on UKISS Wallet.
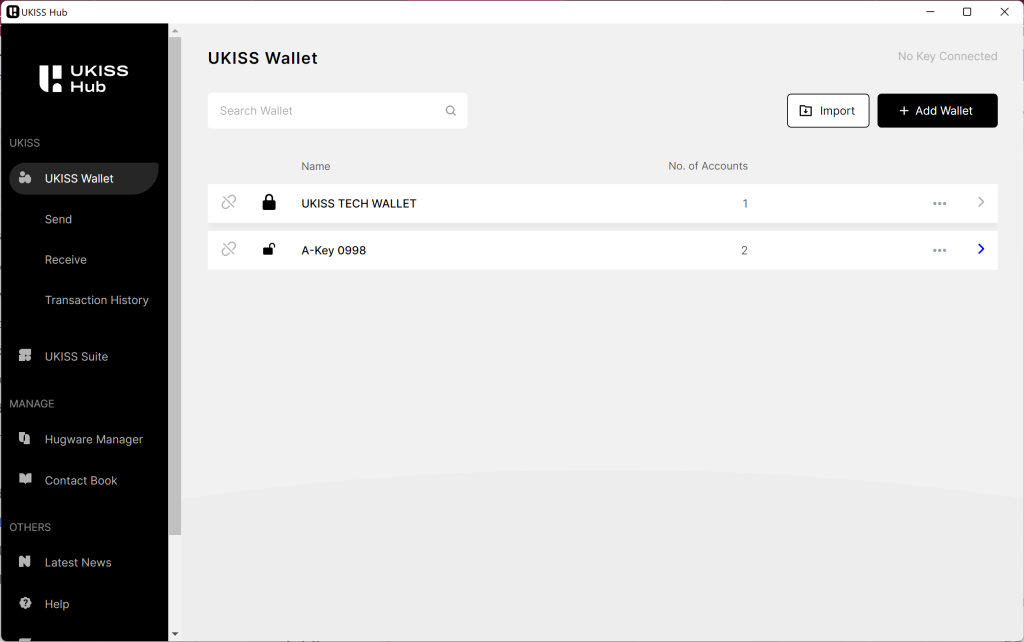
Since you have just set up your Hugware, you do not have a wallet yet. Go to UKISS Wallet and click +Add Wallet.
When creating a wallet, you will have the option to Lock or Unlock your wallet. A locked wallet means that UKISS Hub requires Hugware to be connected for the user to access their wallet and asset data. An unlocked wallet means Hugware is only required to sign transactions but not to view data.
After creating a wallet, you can create an account and give this account a name. You can create more than one account to help organise your assets. You can move your assets across different accounts later.
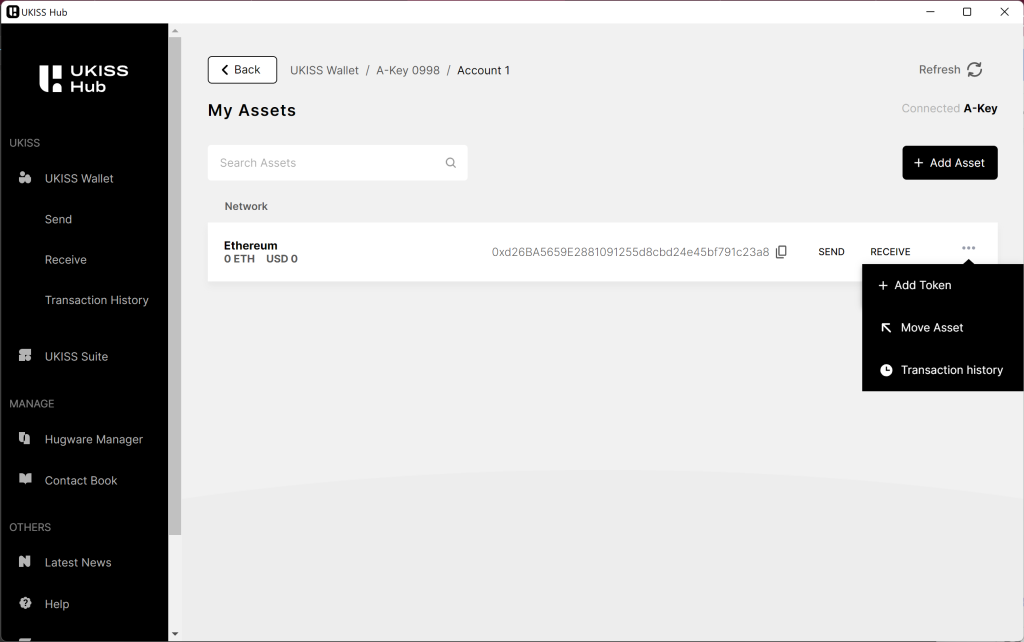
Think about the assets you want to add to Hugware and find out which networks they are on. If it is an ERC-20 token, you should add Ethereum first by clicking +Add Asset and selecting the Ethereum network. For BEP-20 tokens, you will need to select the BNB Chain first.
Once you have added your asset’s main network, you may click on the ellipsis (…) and select +Add Token. You can either pick a token from the dropdown list or click the spanner icon to paste a token address.
Good job on setting up your Hugware wallet addresses! Now, it’s time to transfer your assets accordingly. For more information about using UKISS Wallet on desktop, watch the tutorial on YouTube, or read the user guide.
Stay safe out there!